Events
In EMPPLAN, an event stands for an assignment or a job that an employee (event user) carries out in a location (e.g. food market) on one day for a defined period of time.
The event data record is presented on the so-called event details page and includes all relevant information about an employee’s assignment. The presentation differs between admins and event users, as EMPPLAN supports both user groups in the best possible way according to their tasks.
The EMPPLAN event status process
EMPPLAN offers you a tried and tested workflow to map the process flow of projects and the implementation of events (e.g. promotions, sales campaigns, field service visits).
This workflow can be partially customized and expanded at any time with additional labels that can be associated with event groups and events. This makes EMPPLAN a 100% suitable solution for you – without any additional customization work. You can find detailed information on the use of labels in EMPPLAN in the Project section
Event status flow in EMPPLAN
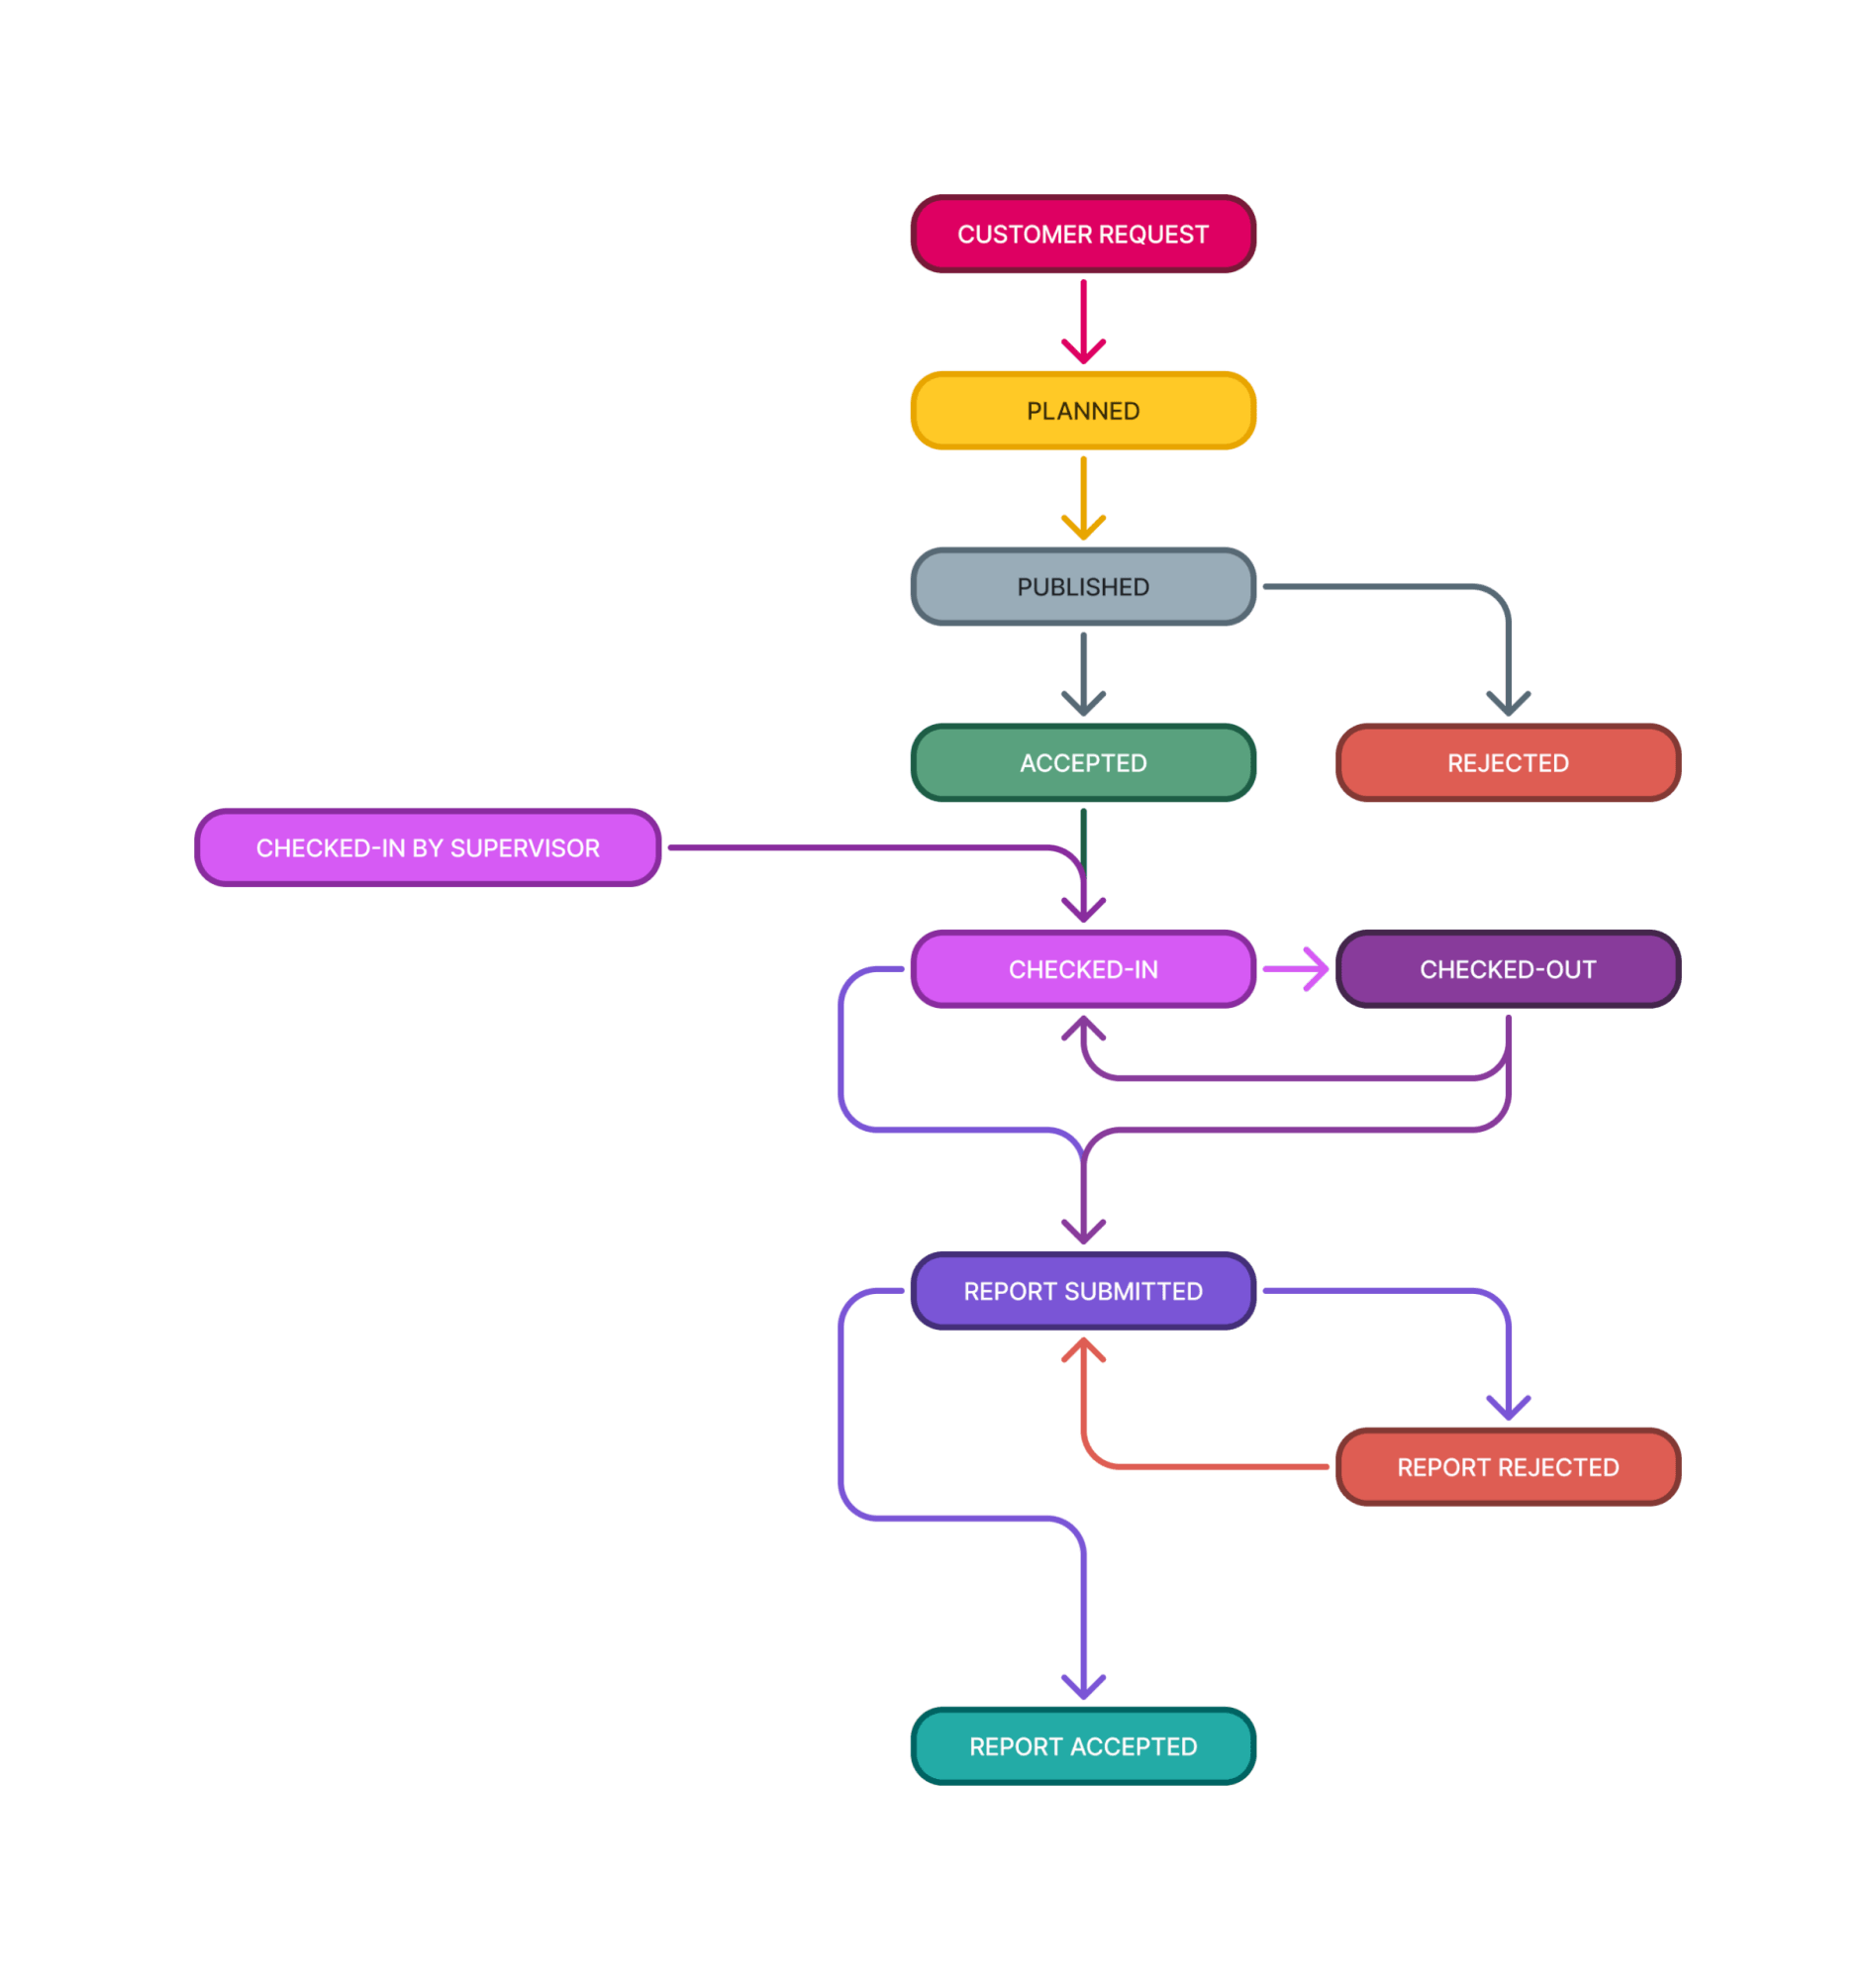
- Customer request (event users will not receive a notification about the event)
- Planned (event users will not receive a notification about the event)
- Published (event users receive a notification about the event and see the event in the calendar and dashboard)
- Accepted (event user bindingly accepts the request for the event)
- Rejected (event user rejects the request for the event)
- Checked-in (event users are at the event and attendance times are recorded. The check-in is a prerequisite for submitting the reporting. In the event group under checked in by supervisior, you can check in an event user manually if they have forgotten to check in)
- Checked out (event users pause their activity at the event or have finished it)
- Reporting submitted (event users have completed the reporting and uploaded it with e.g. the signature of the location staff)
- Reporting accepted (you have checked and validated all details on the event/reporting and approve the event for billing )
The EMPPLAN event details page
The event details page shows admins all available information about the event. You can access the event details page by right-clicking on the respective event group in the calendar or via the event group view itself.
The event details page provides you with the following information from an admin’s perspective:
Reporting
All report types event report, product report, transactions and expenses/expenses for event users are output here if they are activated on the project. You can find out more here.
The reporting can be edited by admins as long as the event has not yet reached the status Reporting accepted
History
Here you can see when the event was created, by whom and how the event data was further processed. You can also track every change to the event status. Check-ins and check-outs are output with geo-tracking data if the event user has consented to tracking
Briefing
The project-specific and event-specific briefing are displayed here. The latter can be edited here
Upload history
Here you will find an upload history of uploaded elements in reporting. For example, you can track iteration levels for various uploads. For example, you can track the iteration stages of various uploads, as even deleted data is still retained.
Possible actions on the event details page
Open event in new tab
open (related) event group in new tab
Send email to user
Call event users
Edit reporting
Add invoice items: Add individual credit or deduction items to the event. In addition to the name and amount in your default currency, you can also enter a cost center for each item.
Delete event
The crosshair opens the location directly in Google Maps.
You can open and edit the project by clicking on the project name. You can find out more under Projects
An event user only has access to the event details page of their events, but never to the associated event group.
Here you can see what the event flow and the event details page looks like for your event users.