Report Management
In the Report Management area, you manage project-specific reports, fields and report products
REPORTS
A report is a questionnaire for data collection that can be filled out by admins, customers (e.g. industry), promoters, merchandisers, sales representatives or even end customers, depending on the report type.
All existing reports with the following information are displayed under Reports:
- Name
- Report type
- Linked projects (in which project do you use the report)
- created
- Fields (how many fields does the report have)
You can edit or delete the report under Actions. When changing reports that are already linked to a project, you should note that, for example, fields that you add to the existing report are only displayed to the event user if they are not yet checked in to the event. Subsequent changes to the report are therefore not possible for events that have already been checked in.
You can assign the report to one or more projects under Linked projects. All fields of the report will then appear in the data collection events
CREATE NEW REPORT
Here you can create a new report with fields and also configure the options of the selected fields for specific reports. You can also configure report options, which have different characteristics depending on the report type.
The preview allows you to preview your configured report so that you can see how an event user will see the report.
You always have access to all fields (field types) on all report types. You can also configure each field within an area with specific field options and visibility conditions. Here are some examples:
- The Number of customer contacts field (e.g. Number) can be defined as a mandatory field. [Example for field option]
- The Number of customer contacts field is only displayed if the question “Was the location open” (e.g. selection field) was answered with Yes. [Example for visibility conditions]
1. Choose from the following report types:
The event report can be used to implement fields that are to be filled in once per event by the event user, e.g. customer frequency (field type: number), live image of the action (field type: upload incl. GPS validation), customer conversations held (field type: number), to name just a few examples.
You can link any number of event reports to one or more projects in EMPPLAN. The respective event reports appear with their fields one below the other in the report area of the events
Specific functions of the report type
Email settings
If you activate this function, you can have the report sent directly by e-mail to a fixed or dynamic e-mail address after submission for certain responses. This allows you to trigger escalation processes directly as soon as a location visit has been carried out, for example.
Report limitation
The report limitation gives you the option of querying or not querying a report under certain conditions. This limitation is currently only available for the report type event group.
The following options are available to you:
- Show report / Hide report: Here you specify the desired behavior if the following specifications are met:
- Territories (associated with customer users)
- Users
- Teams
- Product groups (associated with customer users)
By using the report type Transactions on a project, you activate access to the product database on events, restricted to the products of the product type Promotional products. The event user can thus report all products & services of all brands used on the project. This function is regularly used for service management jobs, sales promotions, location orders or even tastings. It can be used to record how many and which products and services were used / sold / provided at the location and when.
The following fields are available as standard after creating a transaction report and assigning it to your project:
- Time (of the transaction)
- Quantity
- Product / service (search field with auto-complete and barcode scanner function)
- Sales price (optional / fixed or customizable price)
- Order number (usually reference number of a sale from e.g. third-party system, cash register or similar)
- Notes
Please always ensure that only one report of this type is linked to a project, as the report for transactions can only exist once on an event
Specific functions of the report type
Visibility and behavior of standard fields and data
You can influence the standard fields in the report options of a transaction report. For example, you can configure the time to be hidden. This will still be recorded, but cannot be customized.
You can also specify whether the shopping cart function should be activated. This allows an event user to report several products at the same time for a transaction to the same end customer, for example. This saves an enormous amount of time, as additional fields such as customer number, address data etc. do not have to be entered multiple times.
You can also individually configure the visibility and editability of other standard fields. You can also specify whether certain fields should be mandatory fields and appear in the event reporting pdf
Shopping cart function
You can also specify whether the shopping cart function should be activated. This allows an event user to report several products at the same time for a transaction to the same end customer, for example. This saves an enormous amount of time, as additional fields such as customer number, address data etc. do not have to be entered multiple times.
Transaction ID validation
Would you like to ensure that the order number you have entered fulfils a specific format specification? Then you can have this validated when you enter it.
To do this, you can define the permitted format using regex. Both the type and number of characters can be defined in this way. Here are a few practical examples if the order number…
- should be exactly 9 digits long: /^\d{9}$/
- may only consist of digits: /^\d+$/
- may only consist of letters: /^[a-zA-Z]+$/
- should consist of the format “ABC-” and another 7 digits: /^ABC-\d{7}$/
You can test your format specification directly in the report options to ensure that your input works. Simply use the available test field in which you can enter a real order number.
The EMPPLAN support team will be happy to help you implement your specifications.
By using the report type Expenses on a project, you activate access to the product database on events, restricted to the products of the product type Expenses. The event user can then report all expenses / outlays available to them. Expenses can be restricted to projects, teams or users in the product database. This function is regularly used for events where, for example, travel costs or other expenses are also reported individually and, if necessary, reimbursed.
Please always make sure to link only one report of this type to a project, as the report on expenses/expenses can only exist once at an event
Specific functions of the report type
In the standard system, the following fields are available after creating an expense report and assigning it to your project:
- Quantity
- Expenses / outlay (search field with auto-complete)
- Net amount (optional / fixed, customizable or calculated via rule)
- Document upload (upload option for depositing multiple documents)
- Notes
Visibility in event reporting pdf
In the report options of an expense report, you can specify whether the reported expenses / expense products should appear in the event reporting pdf
The event group report can be used to implement fields that can be filled in once per event group by customers and administrators, e.g. to document customer agreements with the location or to provide an agency withbriefings or other customer requests for the created event group.
You can link any number of event group reports to one or more projects in EMPPLAN. The respective event group reports appear with their fields next to each other in tabs on all event groups of the assigned projects
Specific functions of the report type
Email settings
If you activate this function, you can have the report sent directly by e-mail to a fixed or dynamic e-mail address after submission for certain responses. This allows you to trigger escalation processes directly as soon as a location visit has been carried out, for example.
Historical report data
If you activate the display of historical report data, an event user can access previous report data of the same fields that were collected in the same location. The display is specially optimized for field service projects
Report limitation
The report limitation gives you the option of querying or not querying a report under certain conditions. This limitation is currently only available for the report type event group.
The following options are available to you:
- Show report / Hide report: Here you specify the desired behavior if the following specifications are met:
- Territories (associated with customer users)
- Users
- Teams
- Product groups (associated with customer users)
By using the report type product report on a project, you activate the access report products on events, restricted to the products of the product type promotion products. The event user can then submit a report for each of the previously defined products. This function is regularly used for field service or merchandising assignments, where questions about e.g. condition, appearance, stock etc. for previously defined products are reported once per location (per event).
In the standard system, no fields are defined after a product report has been created and assigned to your project.
Please always make sure to link only one report of this type to a project, as the product report can only exist once on an event
Specific functions of the report type
Configuration of quantity entry
In the report options of a product report, you can influence the reported quantity. For example, you can configure that each product is always recorded with the quantity 1 in the background. Select this if you do not require any quantity information.
If, on the other hand, you would like the quantity to be calculated from two number fields, please select these. The two fields must of course be added to the report beforehand. For example, you can have the report quantity per product calculated from the difference between the start and end value. EMPPLAN always subtracts the final value from the start value. For example, listings, discontinuations, stock changes, facings or other quantity-changing processes can be recorded and calculated.
This function is only available for you after individual customization. Please contact the EMPPLAN support team if you would like to carry out and process sales to end customers with EMPPLAN.
This function is only available for you after individual customization. Please contact the EMPPLAN support team if you would like to carry out and process credit notes for sales made via EMPPLAN to end customers with EMPPLAN.
2. Maintenance of further report data
- Name*: Enter a name for your report, which will also be displayed to event users, for example.
- Translation code: If you want to map a cross-market / multilingual project in EMPPLAN, you can define a translation code here in the format ##IamTheReportName. The translation code can then be automatically translated into all available languages in the EMPPLAN translation module. Please ensure that the translation code begins with ## and that no spaces or special characters are used. Instead of the value from the Name field, the translated value is then displayed in the reporting system – depending on the language in which the event user is currently using EMPPLAN.
- Total columns: Here you can define the number of columns in the report. This function is only available for specific reports. Please contact the EMPPLAN support team.
3. Select all relevant fields for the report
Activate the desired fields in the order in which they should appear in the report. You can then set report-specific field options and visibility conditions for each of the selected fields.
Have you not yet created all the fields? Then switch to Fields and maintain them there. You can then add the new fields to your report
In the field options, you make settings that determine how the activated field should behave in this report. You can configure the same field differently in another report
- Do not showname / question in report: Hides the field name
- Show in pdf report: Shows the recorded data in the event report
- Show image in event report pdf (only available for uplods): Includes image uploads the event report.
- large image: Displays image uploads larger in the pdf.
- Mandatory field
- Mandatory field condition: Activate this function to query the field as a mandatory field only for certain conditions. To do this, you can reference answers from other fields.
- Labels: Here you can assign labels to fields. This function is only available for specific reports. Please contact the EMPPLAN support team.
- Commissionable: if activated, a commission can be defined for the field in the project
- visible for customers : if activated, the field is visible for customers, e.g. in the event overview of the customer dashboard
- Column: If you have defined several columns under Total columns in the report data, you can specify here in which column this field is displayed. This function is only available for specific reports. Please contact the EMPPLAN Support Team.
- Field width in %: Here you define the field width. This function is only available for specific reports. Please contact the EMPPLAN Support Team.
- Product groups: Here you can assign the active field to one or more product groups. Only use this function in field service projects, as the locations and field staff (event users) must also be assigned to product groups. The field is only displayed in the report if there is an intersection here. For example, you can ask specific questions about certain product groups and only display them if the location and event user are relevant. If relevant and assigned to several product groups, you can also have the field answered for each product group. The field will then be duplicated automatically and the field will appear for each product group.
Fields can be hidden using visibility conditions. Group operators such as or and and are available for this purpose. You can also reference all fields and, if relevant, products in the report in order to only display the corresponding field if the conditions you have configured are met.
Depending on the field type, different logical operators are available for the relevance check itself. Here is an example: is equal to, greater than or equal to, less than or equal to, greater than or less than.
You can use the round plus button to add further groups, fields or even products to the relevance check.
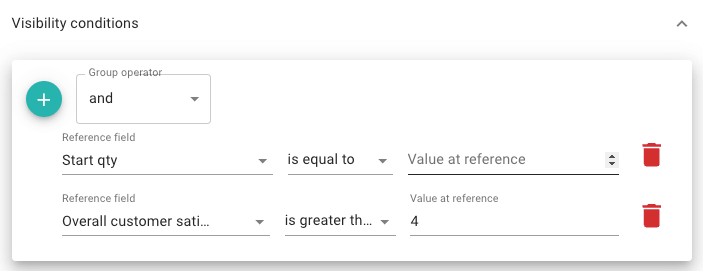
Excerpt of the visibility conditions
FIELDS
All created fields that you can use for your reports are displayed here. Please note that changing e.g. a question (name of the field) has an effect on all reports and linked projects. So if you want to modify questions specifically for a project, only use them in reports for that project.
You can deactivate, activate or delete selected reports via the action menu in the grey area. Deactivated fields are no longer available for selection in new projects.
You can filter by fields in the filter bar.
You can add a new field with the round plus button. Under Preview you can see a preview of your field
You can maintain the following data at field level:
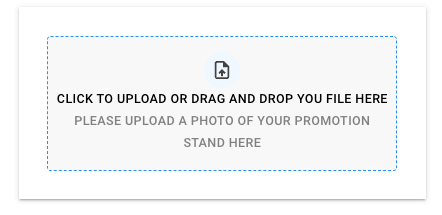
- Name*: Here you can maintain a question or instruction that will later appear for the event user in the reporting (e.g. Did you use a cash register today?, Upload a picture of your promotion stand here, How many customer contacts did you have today?, Customer number etc.)
- Translation code: If you want to map a cross-market / multilingual project in EMPPLAN, you can define a translation code here in the format ##IamTheQuestion. The translation code can then be automatically translated into all available languages in the EMPPLAN translation module. Please make sure that the translation code starts with ## and that no spaces or special characters are used. Instead of the value from the Name field, the translated value is then displayed in the reporting system – depending on the language in which the event user is currently using EMPPLAN.
- Enter your help text here: Here you can enter notes or instructions regarding the field and describe in more detail what exactly you expect from the event user. (e.g. Please take a photo of the promotion stand from the front). If a help text is stored, a question mark with its content appears behind the field.
- Show help text large by clicking on it: If the slider is activated, the help text entered appears as a dialog when you click on the question mark.
- Field type*: Here you can select a type for your field. Each field type stands for different functions, answer options or data entries.
Field types
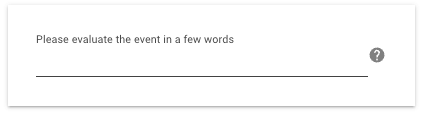
With the single-line text input field, a minimum or maximum number of characters can be configured as required
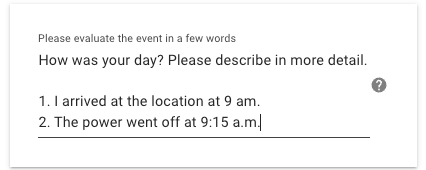
In the text box it is possible to enter text of unlimited length in multiple lines
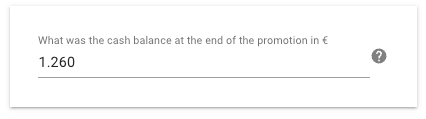
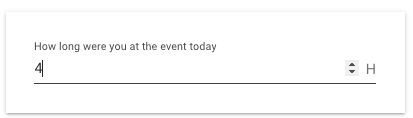
Use the field if you expect a numerical value as an answer. A number can be entered using the keyboard or the symbol box with the arrows.
Here you can define an upload field that can accept exactly one file, e.g. an image or a video.
Further options can also be configured:
- User must share location when uploading (GPS data is collected)
- Force user to take a live picture (user must be online. This is a solution to collect GPS and timestamps from iOS devices)
- Do not optimize the image file size
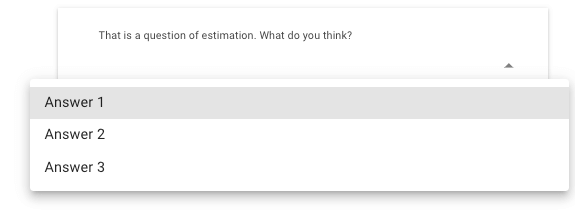
Use a dropdown field if the answer options are to be presented via a dropdown menu and if the answer may only consist of one value.
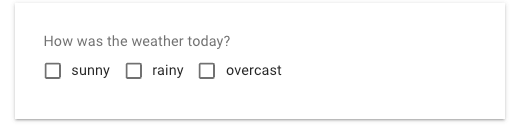
Select the field type Checkbox (multiple choice possible) if you want to use several predefined answer options
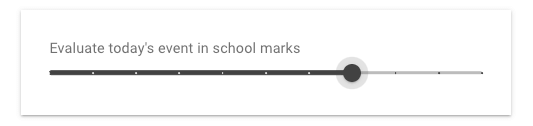
If you decide to use a slider, you will always receive a numerical value as the result.
You can set the following options for this:
- Step, e.g. 0.5
- Minimum, e.g. 1
- Maximum, e.g. 6
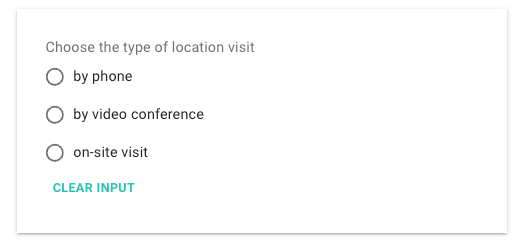
The radio button can be used to select an answer option in the same way as the dropdown
The time field can be used to record working times to be remunerated. With the time field, you can create remuneration rules in the project, if enabled in the field options of your report, in order to remunerate on an hourly rate basis.
Use the field type Heading to structure your report
Only use this field type after consulting the EMPPLAN support team. EMPPLAN’s own data or external data from third-party systems can be accessed here if required
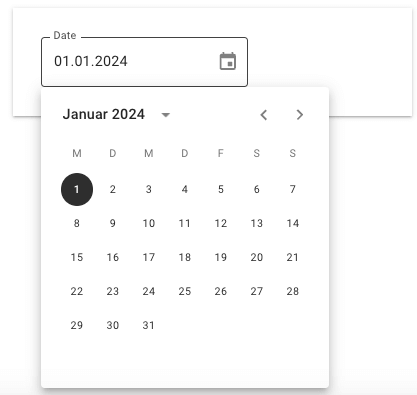
The Date field type allows you to enter a date. You can also define how many days from today should be blocked when entering a date. This is suitable for entering the earliest possible desired delivery date, for example.
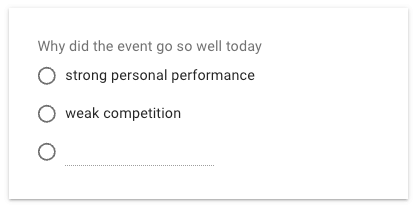
The radio button with free text field allows you to enter an individual answer in addition to predefined answers
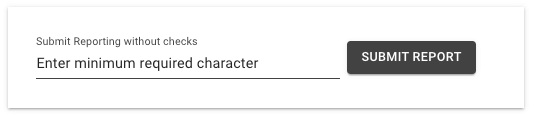
This function displays a REPORTING SUBMIT button. A free text field also appears in front of it. A minimum number of characters can be defined to make the button clickable.
A classic use case for this field type is in field service, for example. If a location is closed, this could be queried and recorded in the event report. Based on this specific response, a rule could be created via the visibility settings to show this field. The event user thus has the option of submitting their reporting for the event, although there are mandatory fields in further reporting that cannot be filled in due to the situation.
A URL can be stored here, which can be dynamized in the report for each event user and location. Parameters can be defined for this, the values of which can consist of event user and location data. One use case is, for example, quick registration in a third-party system to start an event
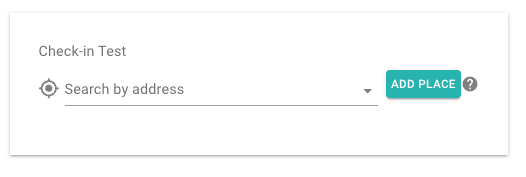
The field type Places (via Google Places) can be used to carry out any number of check-ins in any number of locations within an event, for example. A classic use case is outdoor promotions.
A text-based search for a location or a radius search with location function can be carried out via Google Places. Thecheck-in time, Google Places ID and GPS data are recorded
The Signature field type enables the capture of a signature, e.g. of an end customer, directly on the event user’s mobile device. For this purpose, a signature field is displayed in full screen after activation of the field by the event user. The signature is then stored as an image in the report.
REPORT PRODUCTS
In the report products area, you can define products that should appear in the report type product report. Here you define a product-project-report combination in a data record in order to be as flexible as possible.
You can also specify whether a product should be a mandatory product, which means that a specification must be made for this product in order to be able to successfully submit a product report.
You can delete selected report products via the action menu in the grey area. You can make changes by clicking in the respective column of your report product.
You can add a new report product with the round plus button.
Search by project: Select the project for which you want to create a new report product.
Product search: Select the desired product here. You can find out more about products and how to create a new product in EMPPLAN here.
Search by report: Select the report you want to use for the report product here.
Add your notes here: You can add notes here. These are only accessible to admins who have access to this view.
Mandatory product: Here you can select whether the submission of a report for the respective product is mandatory for the event user or not.